Papywizard
Papywizard xml-preset files and AutoPano Giga is perfect combination to stitch large Panorama.
In this short tutorial I show you how to use the software and create xml-preset files.
After installing the Papywizard software, you need to configure it to match the camera and lens that you will be using to create xml preset files.
These instructions are illustrated with screenshots from the Windows version of Papywizard, but other versions look very similar.
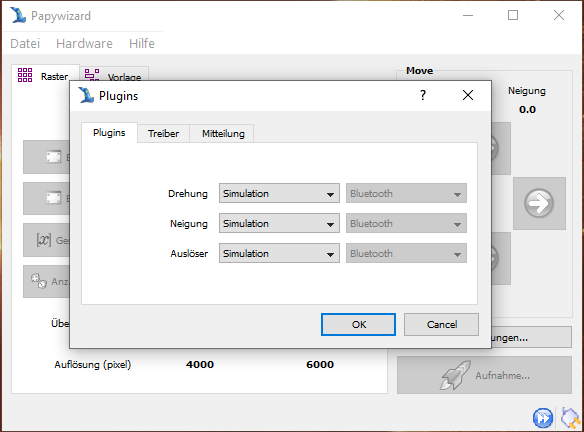
First use the Hardware/Plugins ... menu reach the Yaw, Pitch and Shutter plugin settings. You need to set them all to Simulation the click on ‘OK’ to close the Plugins panel:
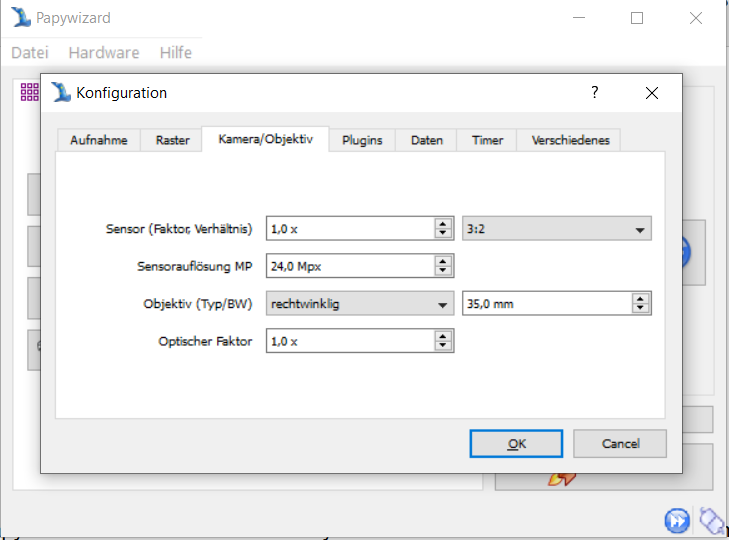
Next click on the ‘Configure’ button and select the camera/lens tab and enter the correct settings for your camera and lens- focal length, lens type, sensor resolution, crop factor and sensor aspect ratio. The optical multiplier field would be used if you had an adapter attached between your lens and camera body:
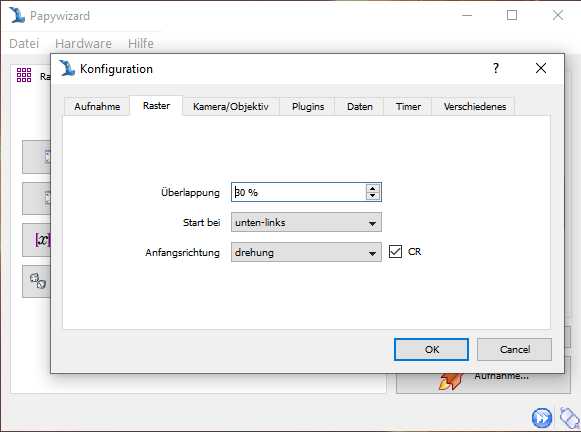
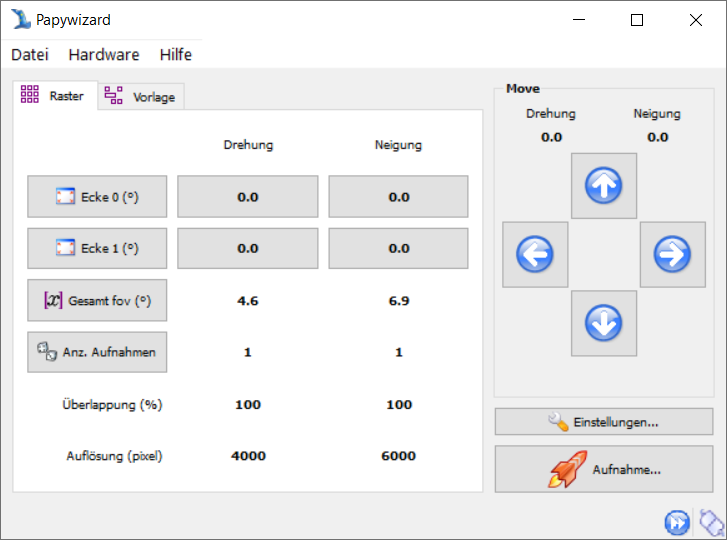
Now select the Mosaic tab, and check and set the values as you prefer, 25% to 30% is a good value for ‘Overlap’:
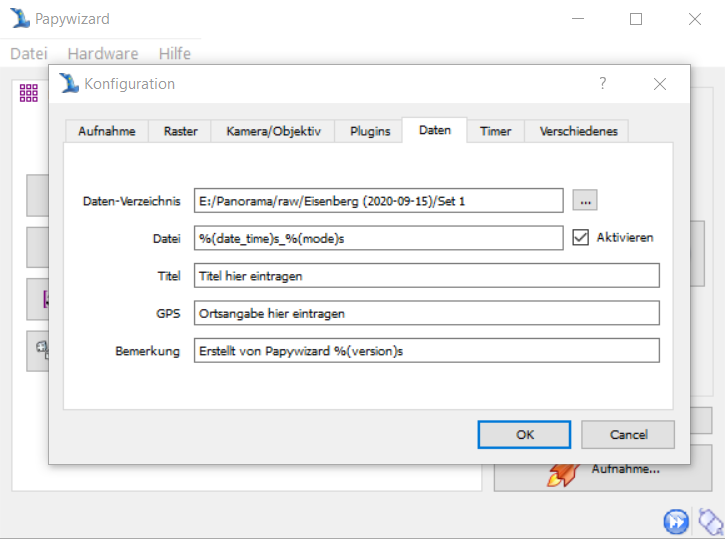
Now chose the Data tab and set the Data directory as you wish. This is the directory to which Papywizard will write the Papywizard XML format data file that you will later convert into a PandroidWiz compatible Mosaic Preset file:
Now click on ‘OK’ and return to the initial screen:
Select Hardware/Connect to enable shooting mode and choose the Mosaic tab:
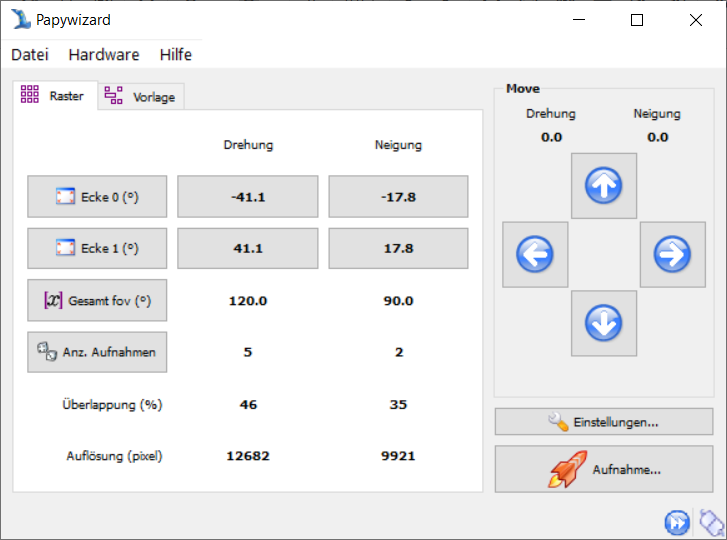
Click on the’ Total FOV’ button and enter the field of view you wish your panorama to cover, you will notice that the values for ‘Nb picts’ change accordingly.
The’ Nb picts’ values are the number of columns and rows that will be required in your grid/matrix shooting pattern to cover the desired field of view with your current camera and lens settings. You could alternatively enter ‘Nb picts’ values and observe how the ‘Total fov’ data changes.
In this example the desired ‘Total fov’ has been set to 120 x 90 degrees, and that this will require a grid/matrix with 7 columns x 3 rows of images.
The’ Resolution (px)’ values provide an estimate of the pixel dimensions of the final stitched panorama.
Now click on the Shoot button to display the Shooting display which shows a graphical representation of the grid/matrix of shooting positions with the starting position highlighted.
Check that the Data Button is checked and then click on the Start button to start the shoot:
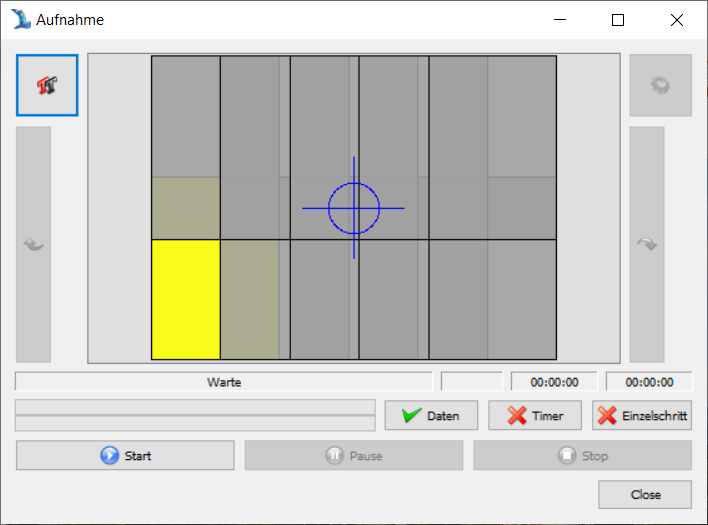
When the shoot has completed click on ‘the finish button to reinitialize the Shooting display.
Now click on the Close button to return to the initial Papywizard screen:

You have now created a Papywizard XML format data file which contains a recording of the yaw and pitch co-ordinates of the grid/matrix of shooting positions centred around a Home position with the co-ordinates zero/zero (0/0).
Now you need to convert that data file into a PandroidWiz compatible Mosaic Preset file.
You do this with an on-line Data-to-Preset file conversion program that you can access here:
http://www.papywizard.org/wiki/DataToPresetConverterWhen